Connect a TV with an Internet Browser
TV must have an internet browser
- Connect the TV to your WiFi
- Temporarily Connect a keyboard to the USB port
- From the Main Menu, Open the internet Browser
- Connect to https://www.patientcheckin.com/login/tv/?s=SYSTEMID (insert your systemid)
- Set to Full Screen
The display will automatically refresh every 10-15 seconds. If you need sound and your TV does not support sound over the internet, you may want to use our dedicated Firestick App
Running the lobby TV through a PC connection
You can also connect any TV using a PC connected to the HDMI port
Make a shortcut on the PC to this link and run it
"C:\Program Files (x86)\Microsoft\Edge\Application\msedge.exe" --kiosk www.patientcheckin.com/login/tv/?s=SYSTEMID --edge-kiosk-type=fullscreen
This method is often used to incorporate sound to call customers and sync multiple TVs
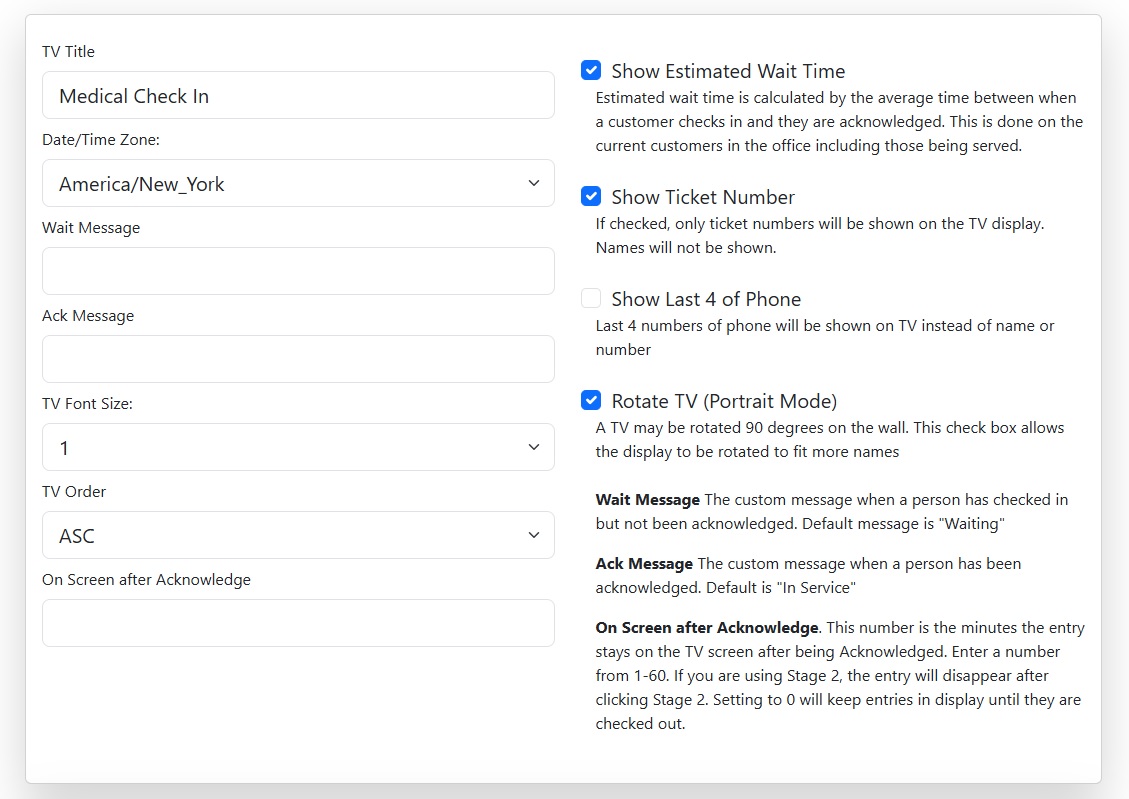
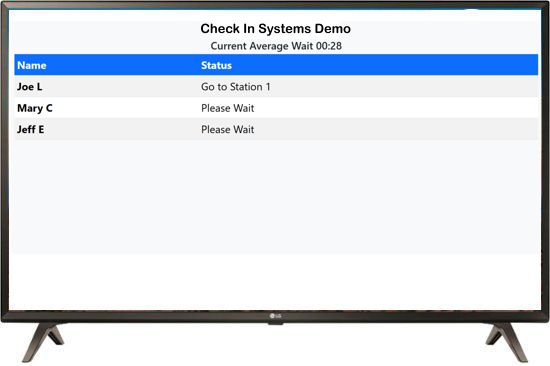
Setup the TV options
Go to Top Menu->Admin->Configuration TV
- TV Title Shown at top of the TV Display. Usually company name.
- Wait Message The message shown after check in and before acknowledge.
- Ack Message The message shown after clicking acknowledge
- TV Font Size Allows all text to be resized on the TV
- TV Order List of names in descending or ascending order
- Onscreen after Acknowledgement How long a customer remains on the TV after being acknowledged.
- Show Estimate Wait time The average time between check in and acknowledge. Be careful as people will expect to be served in this amount of time.
- Show ticket number If your kiosk is using the ticket printer this will show the number instead of a name.
- Only Show last 4 of Phone This is a feature meant to allow staff to call a person by the last 4 numbers of their phone number instead of their name.
- Rotate TV Allows for the TV to be physically rotated to a portrait mode. Allows more entries to be listed on the screen.
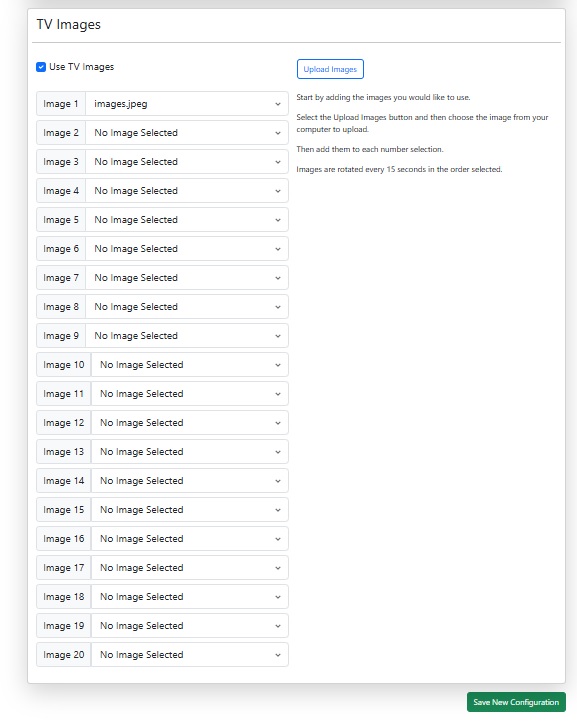
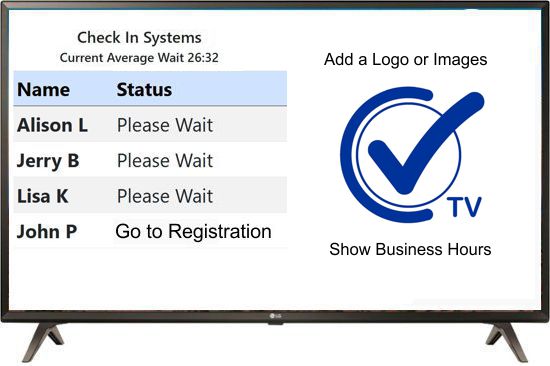
Adding Images to the TV
Go to Top Menu->Admin->Configuration TV
Images can optionally be added to your lobby TV Display. The images appear beside the queue display and use 1/2 of the screen.
- Create an Image Create a jpg file with a size of 1000x1000 pixels.
- Upload an Image Click upload and choose the image to upload
- Choose an Image Use the drop down to choose an image in each position
- Save Configuration Don't forget to save the configuration
Calling names using the TV Display
May require Amazon Fire Stick App
The lobby TV display can call names as they are acknowledged. While some TVs will play the sound, many TVs will not play the sound using just a browser so we developed a dedicated app for the Amazon Fire Stick which connects direct to the HDMI port of the TV.
- Amazon Fire Stick connected to the TV HDMI port is needed
- May be used to connect other TV units using an HDMI splitter
Using our Dedicated FireStick App for Lobby TV
Step up to a dedicated TV App using the Amazon Firestick
When you need a bit more stability and you want to add audio such as calling names to stations, you'll want to add or dedicated TV app. This is done using an Amazon Fire Stick which is available for as low as $20 on Amazon. This device is plugged into the HDMI port of any modern TV. It turns that TV into a full screen lobby display allowing for the customer queue, rotating images or advertisements and sound.Setup your Amazon Firestick using a basic account.
This does not require a payment method but it does require a basic email address. Do not use your personal Amazon account. Create a basic email only account. Do not add a payment method. Make sure your company keeps the credentials in a safe place.Instructions for installing Amazon Fire Stick App
- At the Main Menu, go to the far right and click the Apps icon
- Click on the orange AppStore icon
- Search for "Check In"
- Scroll down to Apps & Subscriptions
- Click the app with Blue Check Mark
- The app will auto-open
- Choose your System
- Enter your System ID
To add the Check In TV app to the first menu;
- At the Main Menu, go to the far right and click the Apps icon
- Hover over the App
- On the remote, click the 3 lines button
- On the menu click 'Move to Front'